Ready to transform your blank walls into a stunning display of your personality? Creating a gallery wall is easier than you think! This guide will walk you through choosing your art, planning your layout, and hanging your masterpieces with confidence. Get ready to mix, match, and make your home truly yours.
Why Should You Create a Gallery Wall in Your Home?
Ever look at a blank wall and feel like it’s just… waiting for something? A gallery wall is your answer! It’s more than just hanging pictures; it’s about curating a visual story that reflects you. Whether you’re a homeowner looking to add character or a renter wanting to personalize your space without major renovations, a gallery wall offers incredible benefits:
- Express Your Unique Personality: Your home should feel like you. A gallery wall is a fantastic way to showcase your passions, memories, and aesthetic. From travel photos to abstract prints, every piece tells a part of your story.
- Transform Any Room: A well-designed gallery wall can turn a plain wall into a focal point, adding depth and interest to living rooms, hallways, bedrooms, or even a cozy reading nook. It instantly elevates the ambiance.
- Adapt to Your Style and Space: The beauty of a gallery wall is its versatility. You can go minimalist with clean lines, embrace an eclectic mix of treasures, or create a cohesive display of family memories. It adapts to almost any room size or decor style.
How Do You Plan Your Perfect Gallery Wall?
Before you grab a hammer, a little planning goes a long way. Thinking through these steps will save you time and ensure your gallery wall looks fantastic.
Where is the Best Place for Your Gallery Wall?
Consider the flow and function of your space.
- Living Rooms: Above a sofa or fireplace is a classic spot for a grand, impactful display.
- Hallways: These often-overlooked spaces are perfect for a linear arrangement that guides the eye.
- Staircases: A dynamic, ascending gallery wall can make a staircase a true design feature.
- Bedrooms: Opt for more intimate pieces that create a calming, personal retreat.
Think about the scale of the wall and any existing furniture. You want your art to complement, not overwhelm, the space.
What Theme or Style Should You Choose?
This is where your personality shines!
- Minimalist: Think clean lines, monochromatic pieces, and consistent framing for a sophisticated, understated look.
- Eclectic: Mix and match different sizes, colors, mediums, and frame styles for a vibrant, collected feel. This is great for showcasing a diverse collection.
- Family Memories: Combine cherished photos, children’s artwork, and sentimental mementos for a heartwarming display.
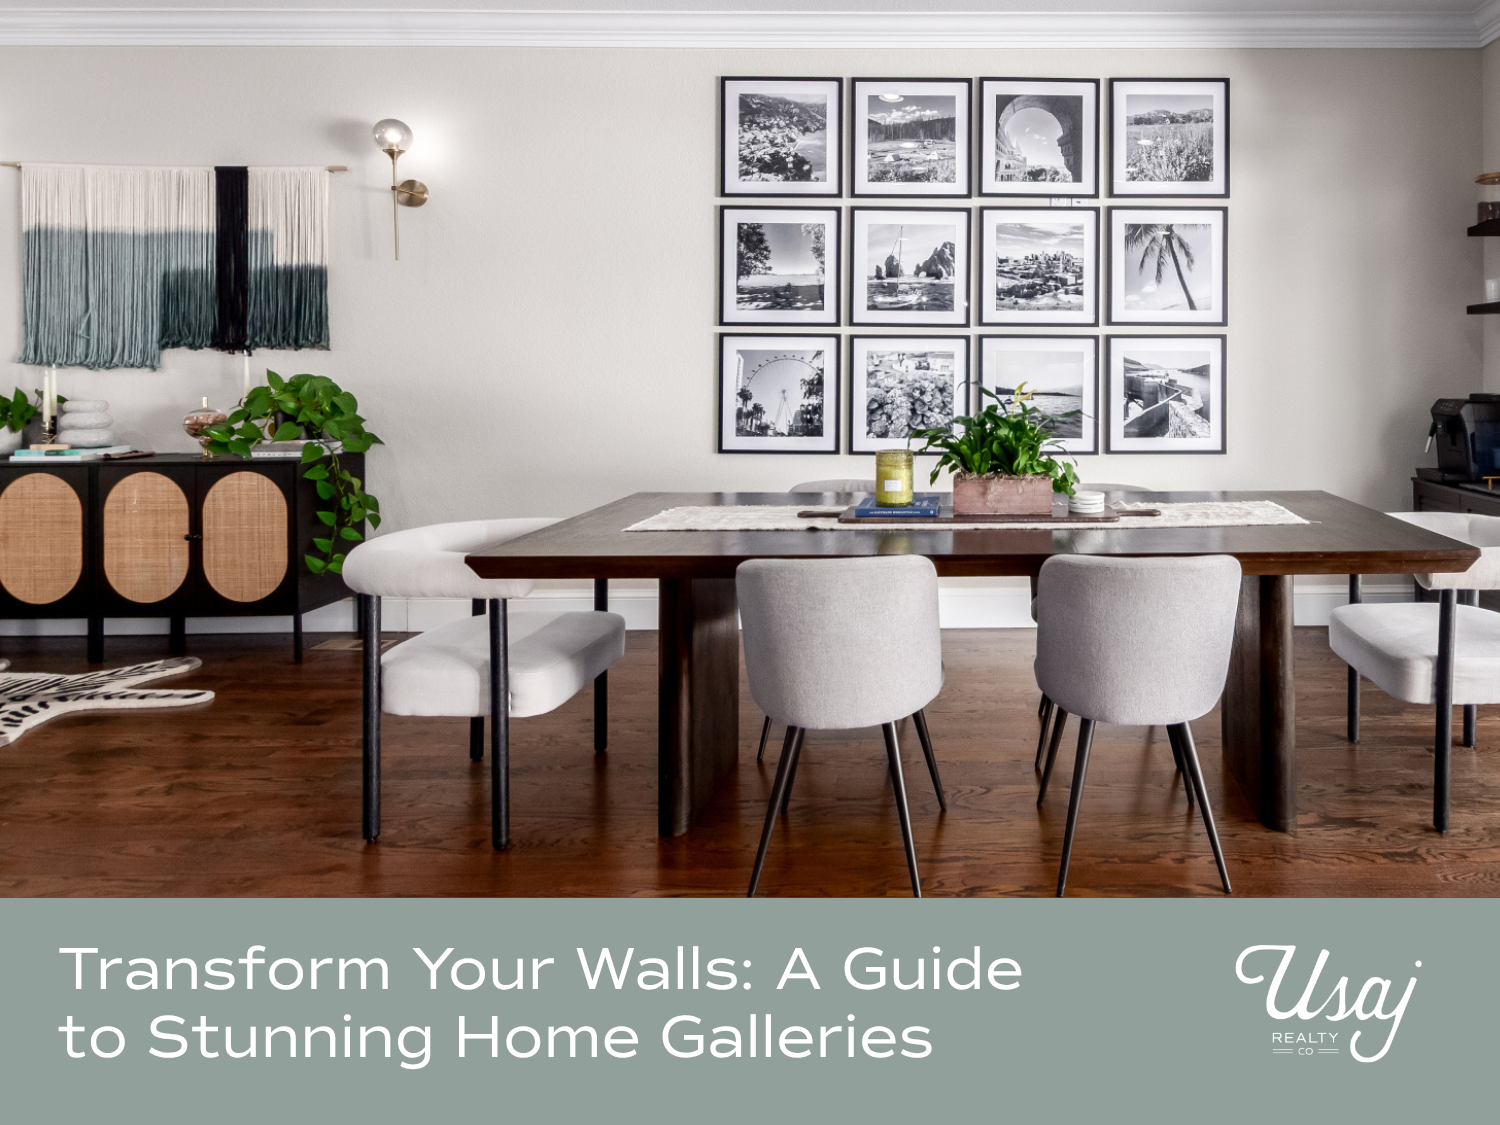
- Color Palette: You can create cohesion by sticking to a specific color palette. For example, a gallery of black and white photos offers a timeless elegance, while a collection of pieces with blues and greens can evoke a serene atmosphere.
How Do You Select Your Artwork and Frames?
Don’t feel pressured to buy expensive art! Your gallery can be a mix of:
- Framed Prints and Photos: These are the backbone of most gallery walls.
- Unique Art Pieces: Consider original paintings, drawings, or even digital prints from independent artists.
- Three-Dimensional Objects: Don’t be afraid to incorporate mirrors, small shelves, sconces, embroidery hoops, or even decorative plates to add texture and depth.
- Personal Mementos: A concert ticket stub, a child’s drawing, or a postcard from a memorable trip can be beautifully framed and included. Anything that holds meaning to you can be art!
When it comes to frames, mixing styles can add interest, but aim for a consistent tone or finish. For example, combine a simple black frame with a more ornate gold one, or stick to various wood tones.
How Do You Lay Out Your Gallery Wall Like a Pro?
This is the step that often feels the most daunting, but with a few tricks, you’ll be a layout master in no time!
What are the Most Popular Gallery Wall Layouts?
- Grid Layout: Perfect for a clean, modern aesthetic. This involves arranging equally sized frames with consistent spacing in a symmetrical grid.
- Asymmetrical Layout: This dynamic approach allows for a mix of frame sizes, shapes, and orientations. It feels more organic and collected over time.
- Linear Layout: A single row of frames, ideal for narrow spaces like hallways or above a long piece of furniture, offering a minimalist yet impactful statement.
How Do You Mock Up Your Layout Before Hanging?
Avoid “Swiss cheese” walls from too many nail holes! This is the golden rule:
- Paper Cutouts: Trace each piece of art onto kraft paper or wrapping paper and cut them out. Don’t forget to mark where the hanger is on the back of each frame!
- Tape It Up: Use painter’s tape to arrange these paper templates on your wall. This allows you to experiment with different configurations, spacing, and heights without any commitment. Snap a photo with your phone to compare different layouts.
- Floor Layout: For larger collections, lay your pieces out on the floor within a taped-off area that matches your wall space. This gives you a full overview before moving to the wall.
What’s the Secret to Perfect Spacing?
Consistent spacing is key to a polished look, even with an asymmetrical layout.
- General Rule: Aim for 2-3 inches between each piece of wall art. For larger pieces, you might allow a bit more space (up to 6 inches).
- Anchor Your Design: Start by placing your largest piece slightly off-center or in one of the four outer corners (for smaller collections). Build around this anchor, spreading out pieces of similar size, color, and style to maintain visual balance.
- Eye Level: A good general guideline is to have the center of your gallery wall at eye level, typically around 57-60 inches from the floor. Adjust this based on your ceiling height and any furniture below.
What Are Some Smart Tips for Hanging Your Gallery Wall?
Once your layout is perfect, it’s time to make it permanent!
- Gather Your Tools: You’ll need a tape measure, a pencil, a level, a hammer, and appropriate nails or wall anchors for the weight of your frames. Damage-free hanging strips are also a great option, especially for renters.
- Use Your Templates: With your paper templates taped to the wall, simply hammer your nails directly through the marked hanger spots. Then, carefully rip off the paper. Voila! Your nails are perfectly placed.
- Consider Lighting: Good lighting can make your gallery wall truly shine. Spotlights or picture lights can highlight individual pieces or the entire collection, adding a professional touch and enhancing the ambiance of the room.
- Add Final Details: Once your art is hung, step back and see if any small decorative elements could enhance the look. A small plant on a nearby shelf, a unique ceramic piece, or even a carefully chosen throw pillow can tie the whole space together. Remember, less is often more – let your art breathe!
Ready to Create Your Own Home Gallery?
Creating a gallery wall is a rewarding project that infuses your home with personality and charm. It’s a chance to tell your story, celebrate your memories, and showcase the art that speaks to you. Don’t be afraid to experiment and have fun with it!
At Usaj Realty, we understand that a home is more than just a house; it’s a canvas for your life. Whether you’re looking to buy your dream home in Denver or sell your current one, we’re here to help you find a space where you can truly express yourself. Explore our Denver Neighborhoods to find the perfect backdrop for your next gallery wall, or visit our Learning Center for more home inspiration!